I had great intentions of posting this card yesterday but my friend called me and I went on a road trip with her to buy her new car. Here is a picture of her behind the wheel. So we headed out around noon hour and got back around 9 last night.everyone had to fend for themselves for supper, and all of my card making stuff was over the table. Oopsie, hehehe
Also my Stampin' Up order arrived yesterday, so I can hardly wait to get into that.
Ok enough of me, on to the card. I saw this card idea, and when I find out where I saw it I will give her credit, and I really wanted to try it. I think this would really be a nice way to add color to some of your really intricate stamps.
I added more layers then i usually do, but I really wanted to bring all of the colors together. I cut each of my layers 1/4 inch bigger than the previous one, and I don't know about you, but to make sure I have my layers cut just right, I write out the dimensions on a sheet of paper. You know what they say, measure twice cut once.
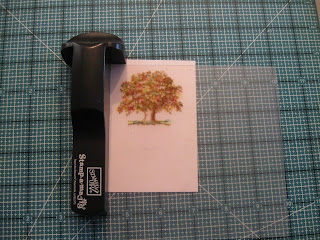
I used my Stamp a ma Jig for this project, and you'll see why as we go.
First I cut white card stock 4.25 x 3 inches, then using my Stamp a ma Jig I stamped one of the trees from the stamp set Lovely as a Tree in More Mustard. This is one of my favorite stamp sets and one of the first ones I bought. You can use the trees for so many possibilities.
Ater you have enough color where you want it, take your Stamp a ma Jig and line up where you stamped your tree and re-stamp over your chalking in chocolate chip. Amazing, huh?
Next I took orange card stock cut at 4.5 x 3.25 inches and sponged the edges with Cajun Craze. Yellow card stock cut at 4.75 x 3.5 inches and sponged the edges with More Mustard, and green card stock cut at 5 x 3.75 inches and sponged the edges with Old Olive. I just realized, looking at my posts, that I said Cajon Craze but in the picture an orange stamp pad is showing, I tried the orange first but it didn't show up well on the card stock so I switched and the Cajun Craze gave a much nicer effect.
I cut a 5 inch piece of Old Olive ribbon and wrapped it around the top card piece and attached with snail adhesive. Then assemble the pieces.
I wanted to add a little something more to the card, and I have a fall leaves punch from Creative Memories, so I punch out some leaves with my leftover coordinating card stock and sponged the edges as well.
I stamped a sentiment from the Teeny Tiny Wishes stamp set, this is one of my new stamps sets I just received. Punched it out with my Word Window punch, and layered it with the Modern Label punch. I think it came out beautiful, and as I always do when making cards, you could easily have a dozen of these laid out and made in a short period of time, and I think they are a nice masculine card as well. And masculine cards always seem to be a little more difficult to make.
I hope you enjoyed this tutorial, and that I have inspired you to try this on other stamps. Happy crafting, Tina


hi Hon,
ReplyDeleteThis card is beautiful can't wait to try it myself. Tell Tracy congrats for me. Keep up the great work.
Lov Ya Mom xoxoxoxo